

I am so excited to share this project with you! While I enjoy crafting, it is something that I often don’t make time for simply because it can be time intensive and the cost of supplies adds up quickly. I’m the mom who pins a lot of fantastic ideas on Pinterest without actually doing most of them.
This project, however, was different. It was simple, CHEAP (less than $2.00!), quick, and it encourages imaginative play. What’s not to love?
With Vivian’s birthday rapidly approaching, I’ve been browsing Pinterest a tad more than usual trying to find gift ideas. One thing I came across was a felt playscape, and I immediately liked the idea. Viv has a number of toy animals and while she enjoys stacking them in her Noah’s ark, there isn’t really anywhere for them to go. I like the idea of making her a simple mat, her own little world, where her figures could play.
My hope and plan is to crochet her a larger, more detailed mat, but that falls into the more-money-and-time category. I’m sure there will be a blog post about that in the coming months. For the moment, though, this little mat does the trick.
Supplies Needed For Felt Playscape:
Felt (I used green, blue, light grey, and dark grey)
Hot glue gun + glue
Pen
Paper
Scissors
Fabric scissors
The Felt
I had planned on buying felt at a craft store, but when I was at Walmart recently I happened to notice that they had these little felt pieces (9″ x 12″) for $0.28 a piece. They were the perfect size and price to experiment with. However, if you want a larger mat, you could buy a bigger piece of felt from a fabric + craft store for not too much money.
Note: pictured you will see 7 blocks. I did not end up using the brown or black and later returned them to the store. You may use more or less colors depending on how you decorate your playscape.
The Water
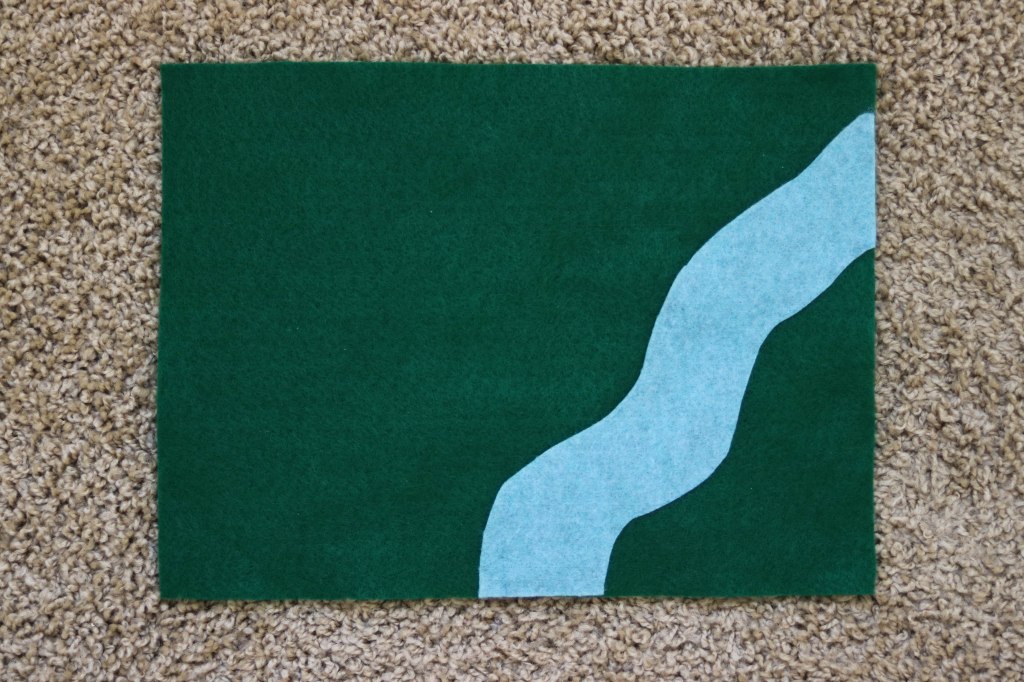
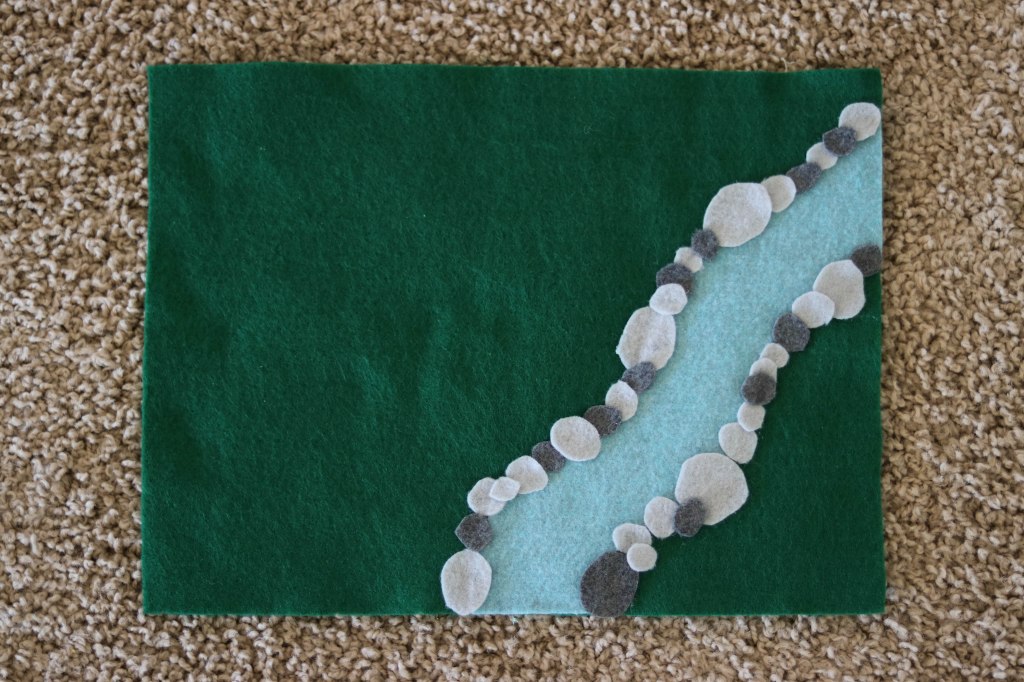
The first thing I did was cut a blue piece for the water. The beauty of this project is that it’s entirely up to you how it looks. You could make a creek, a pond, or have no water at all. I ended up making a creek for mine, using a pen to faintly draw the lines on the blue felt. Once you’ve cut your water, apply hot glue to the edges and position on your base piece. You may find it easier to glue a small section at a time so that you don’t have to worry about the glue drying before you get it in place.
The Trees
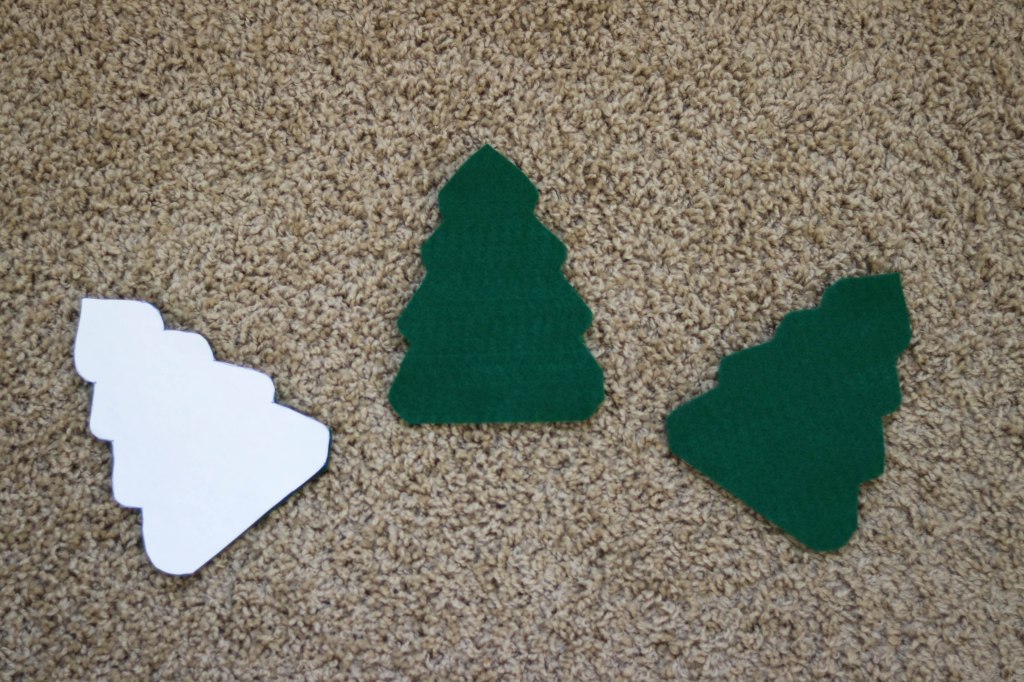
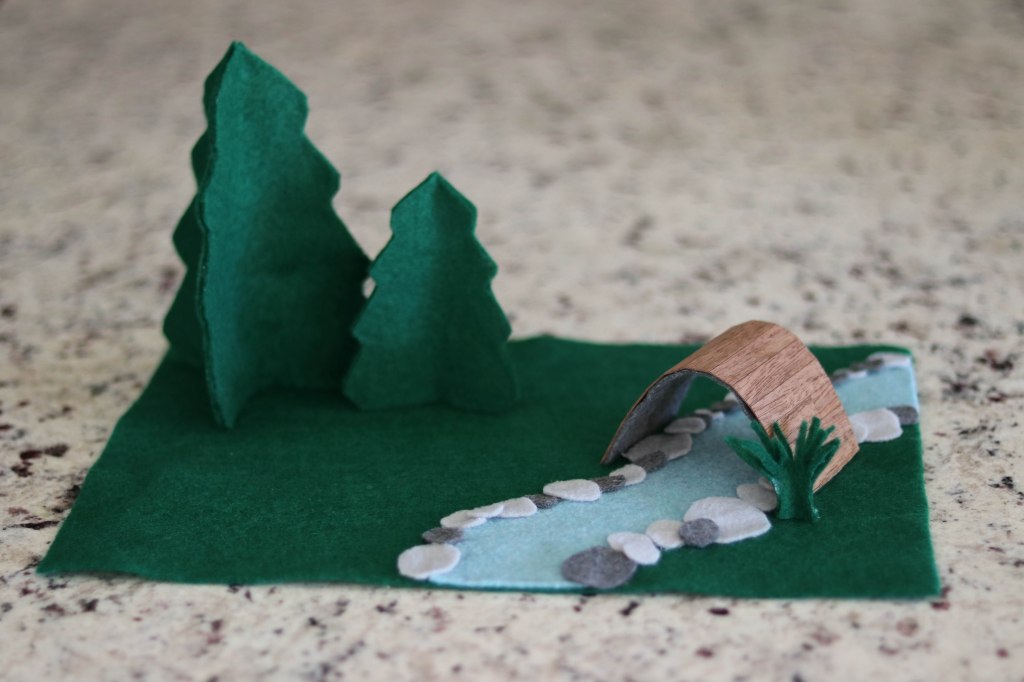
I love the design of these trees. I used this PDF provided by The Wool Food Mama to trace the outline of the tree onto paper, then cut it out for my stencil. Place the paper tree on your felt color of choice, attaching it with either tape or pins so that it doesn’t shift around while you’re working. Cut out three shapes per tree.
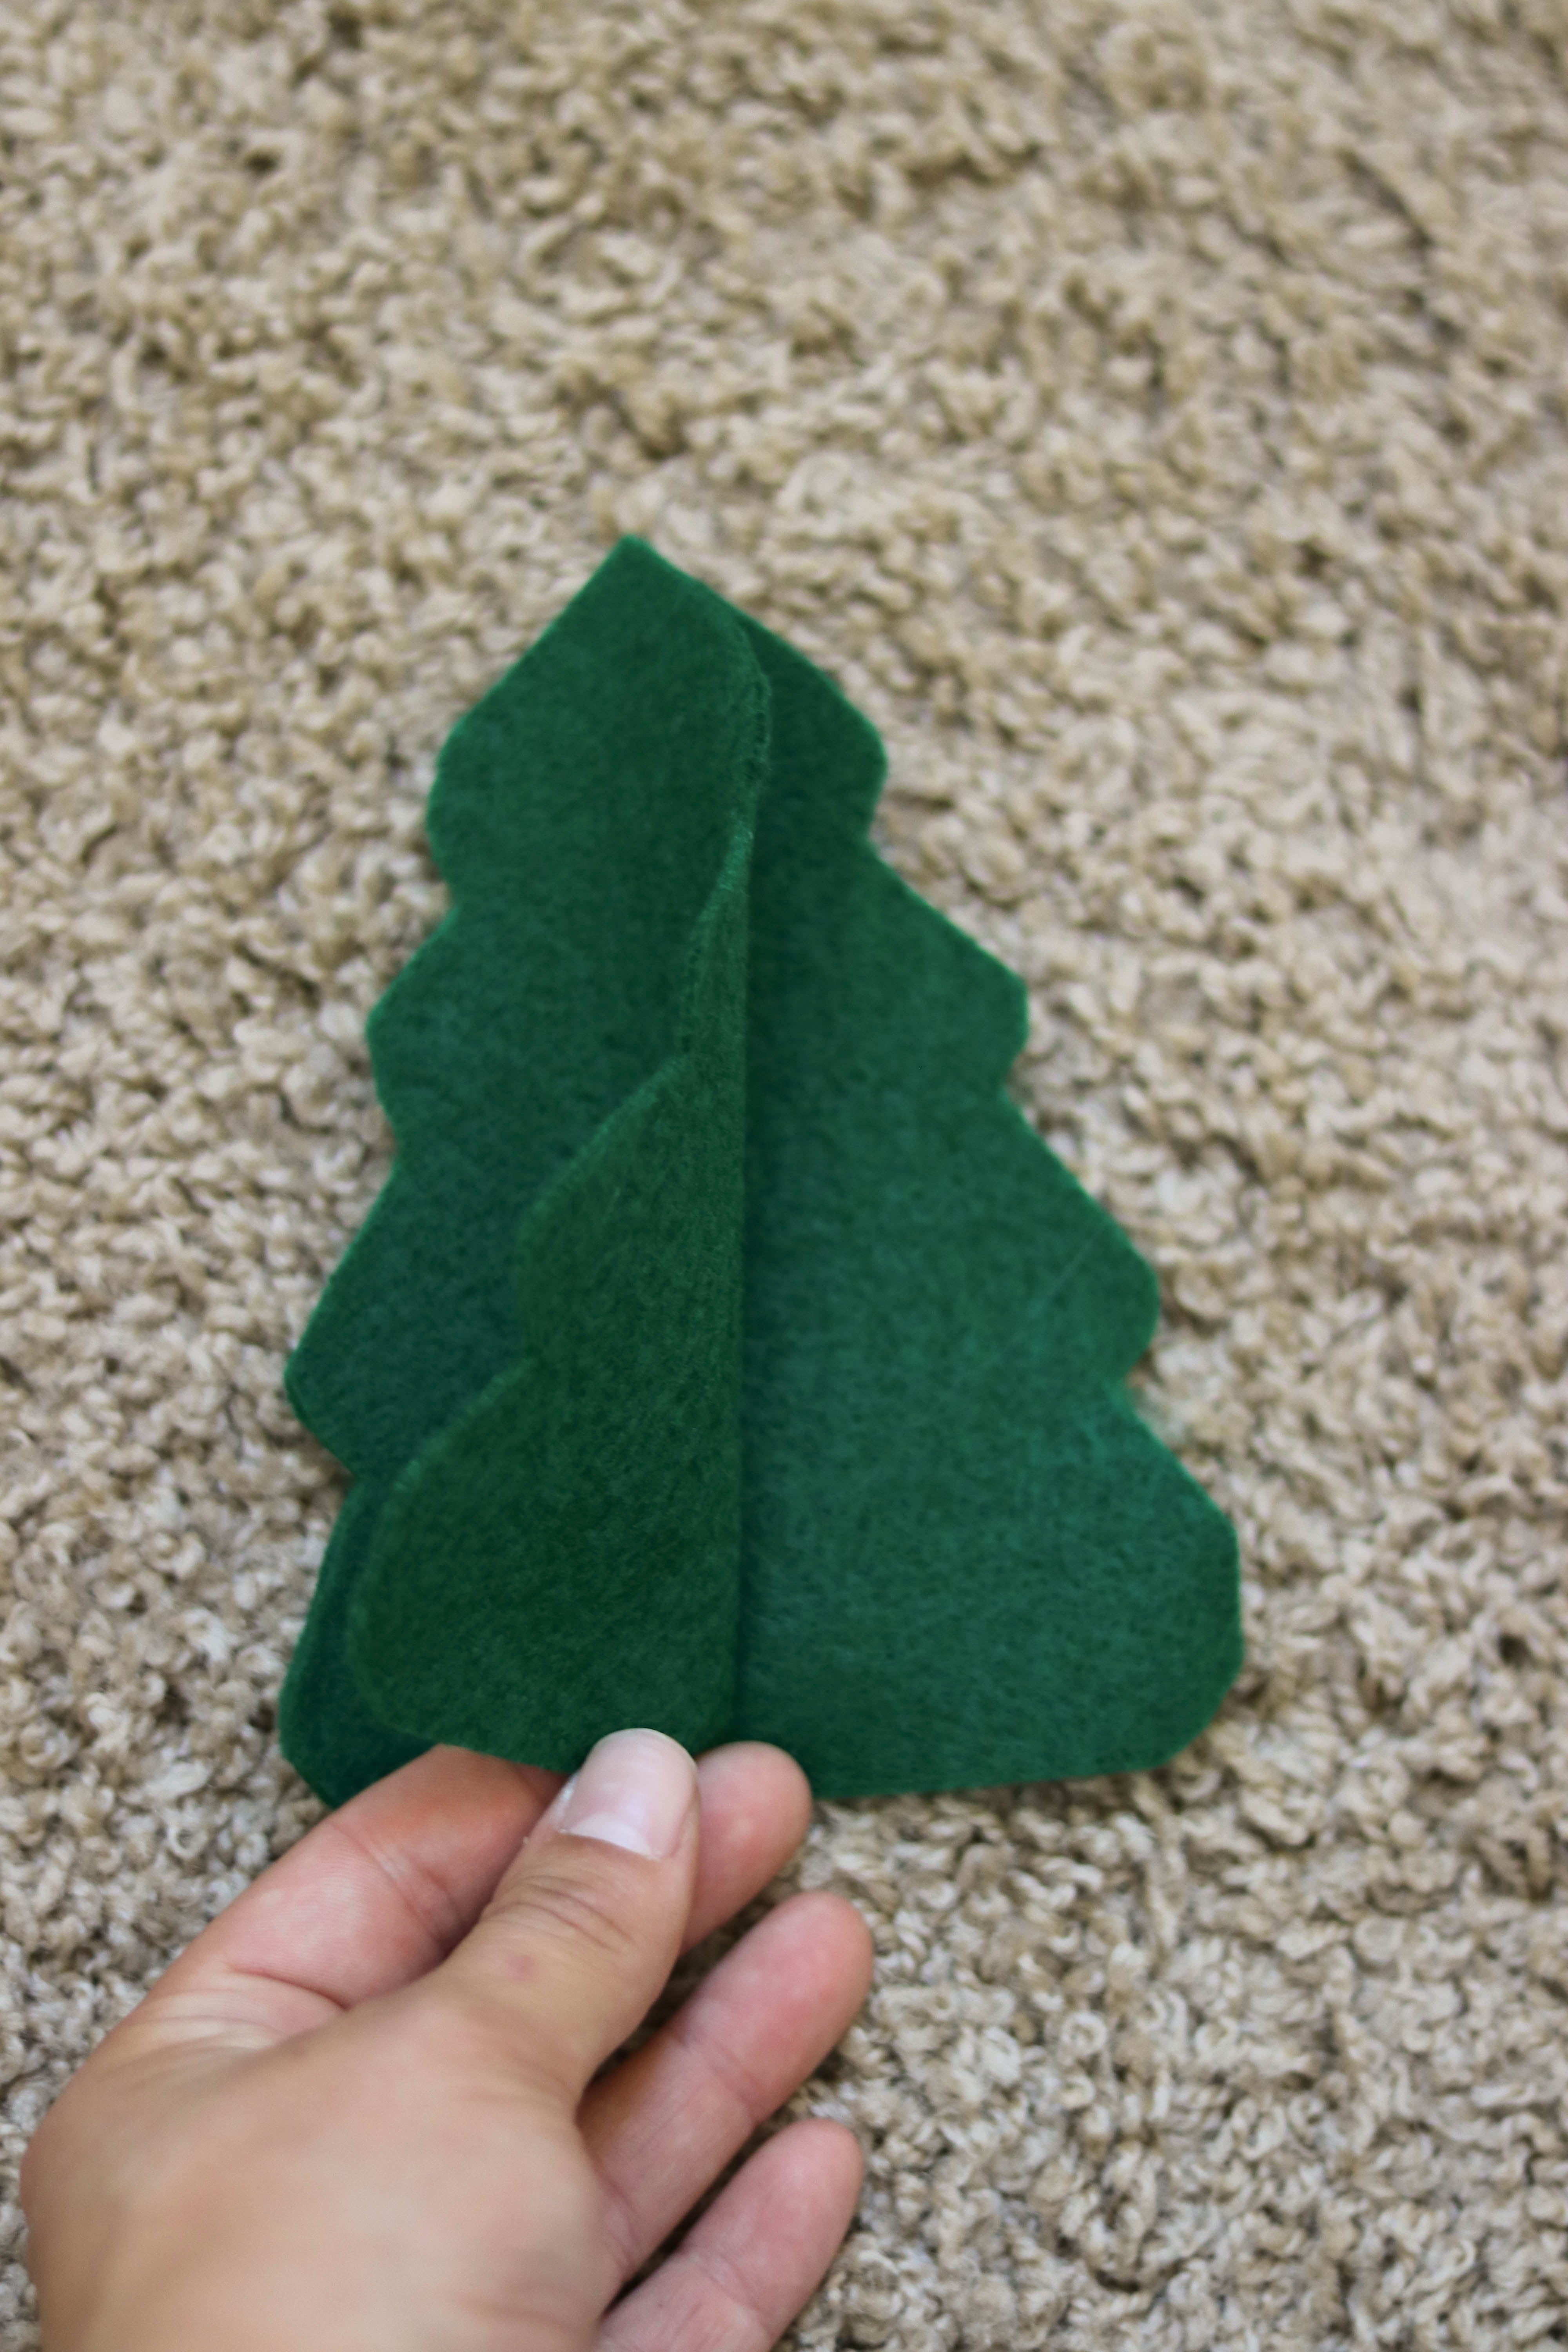
Make sure that the trees are all oriented the same way, then run a line of glue down the left edge of one tree; place the second directly on top of it. Now you should have two trees, halfway attached.
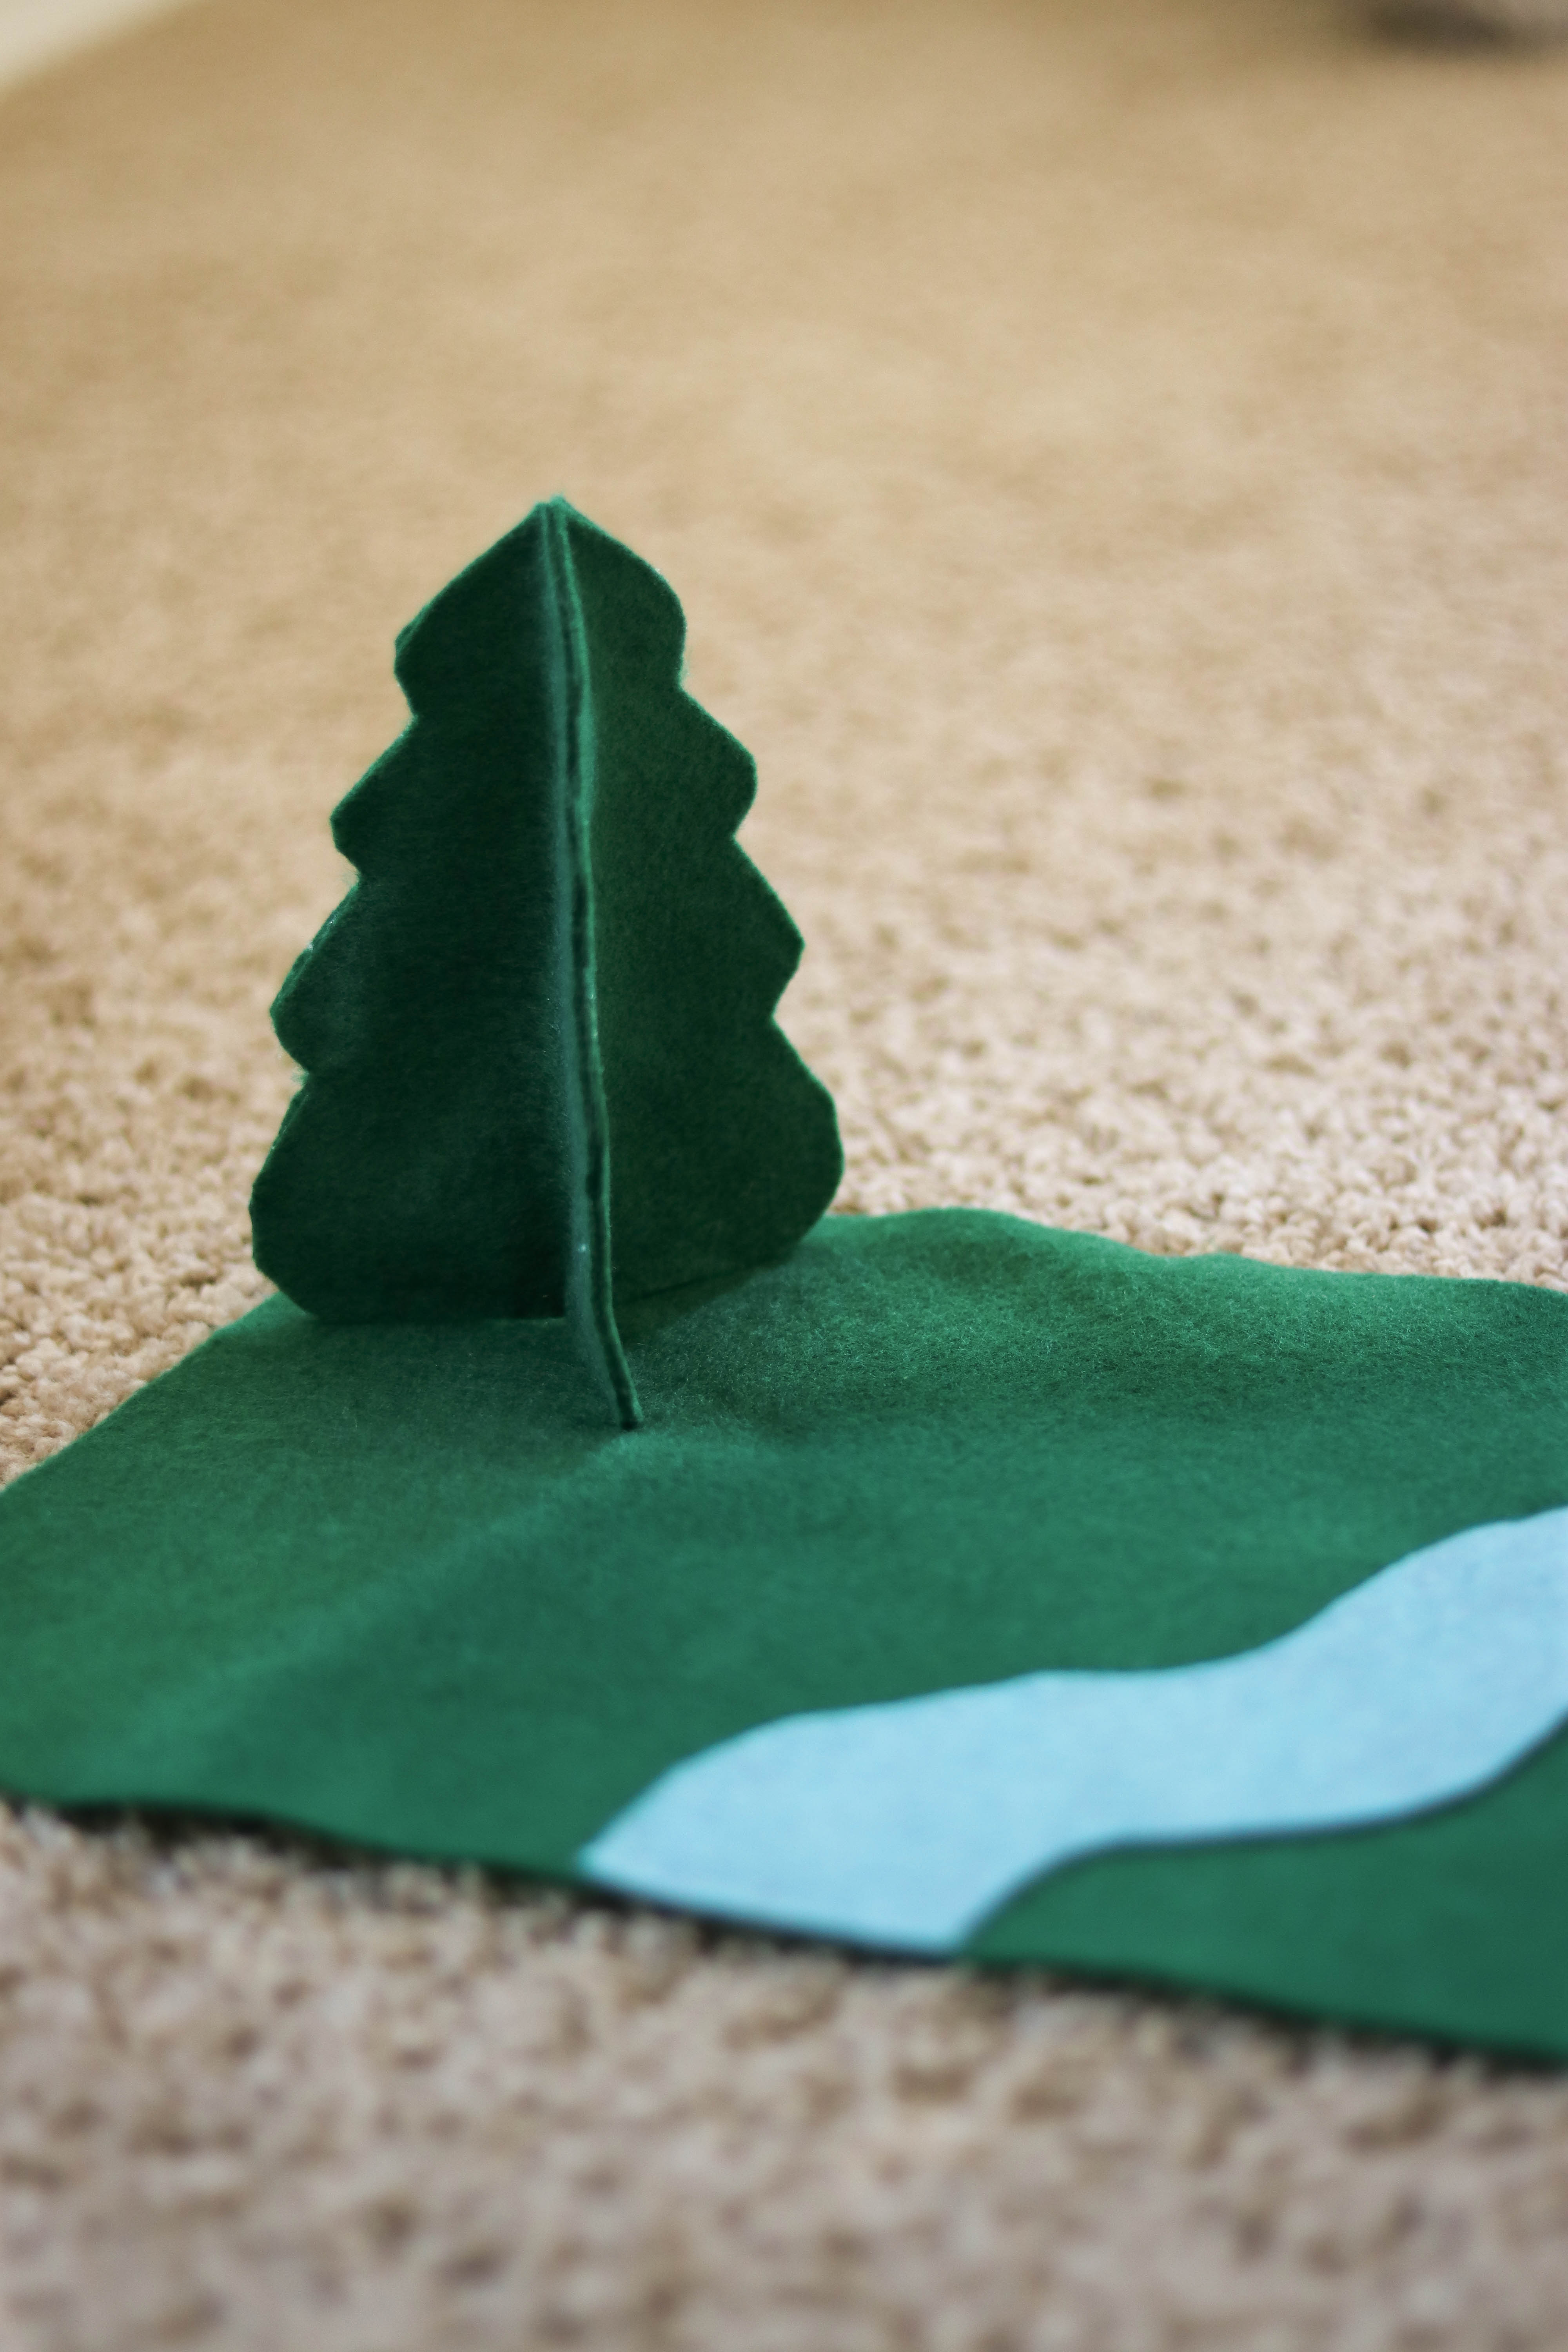
Open your tree (as pictured above), and again run glue down the left (in)side. Affix the third tree cutout. Now glue the right (in)side and close off your tree. Tada! Use more hot glue to ensure that the bottom is closed as well. Repeat as many times as desired. I ended up making three trees (one larger and two smaller ones).
The Rocks
Not much instruction to give here – do what you like! Because rocks are non-uniform by nature, I didn’t bother with a pattern; I simply cut out a bunch of circle-ish shapes in both light and dark grey, varying the size. It’s up to you whether you want a lot of rocks or just a few. I opted to line both sides of my creek to conceal the raw edge of the blue, giving it something of a park look. Once all your rocks are cut, glue them in place.
And there you have it! Your very own basic playscape. Of course you can dress it up – perhaps you’d like a walking path, or some flowers. With some of my leftover green felt I made a small bush to put near the water; I may use yarn to add some grass as well. You’ll notice a little wooden bridge in my photos. That was made with some scrap flooring I had left from a dollhouse, but you could make something similar by gluing Popsicle sticks together in an arch.
The felt for this project cost $1.40, so even factoring in the hot glue used it still comes in at well under $2.00. Ideally you would probably want something a little bigger, but for the price I am very please with how it turned out and can’t wait to make a larger, more detailed version!
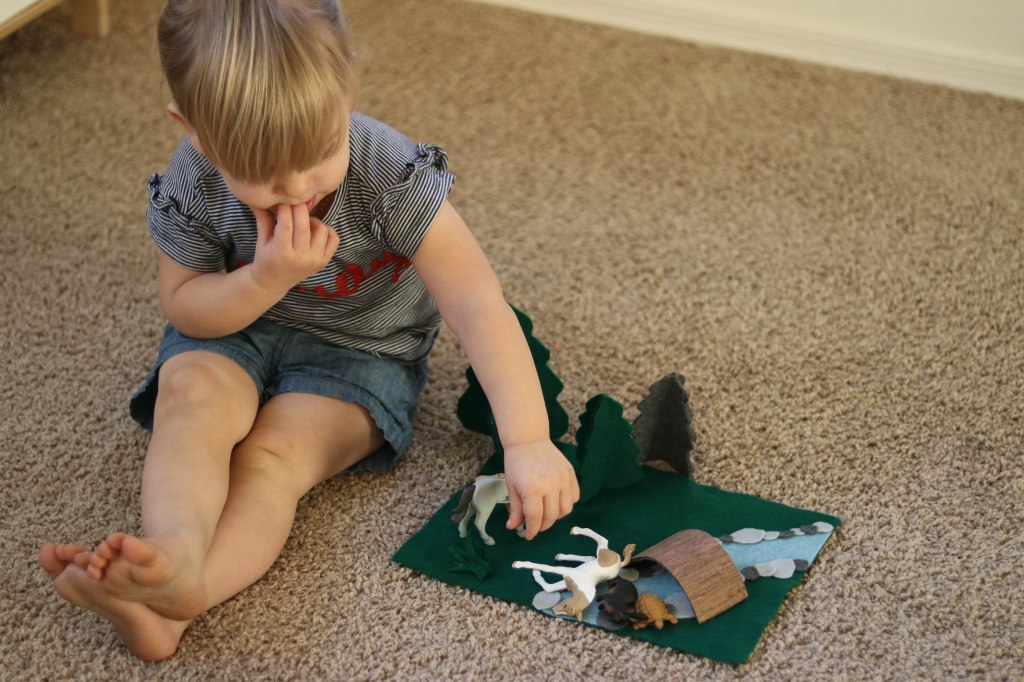
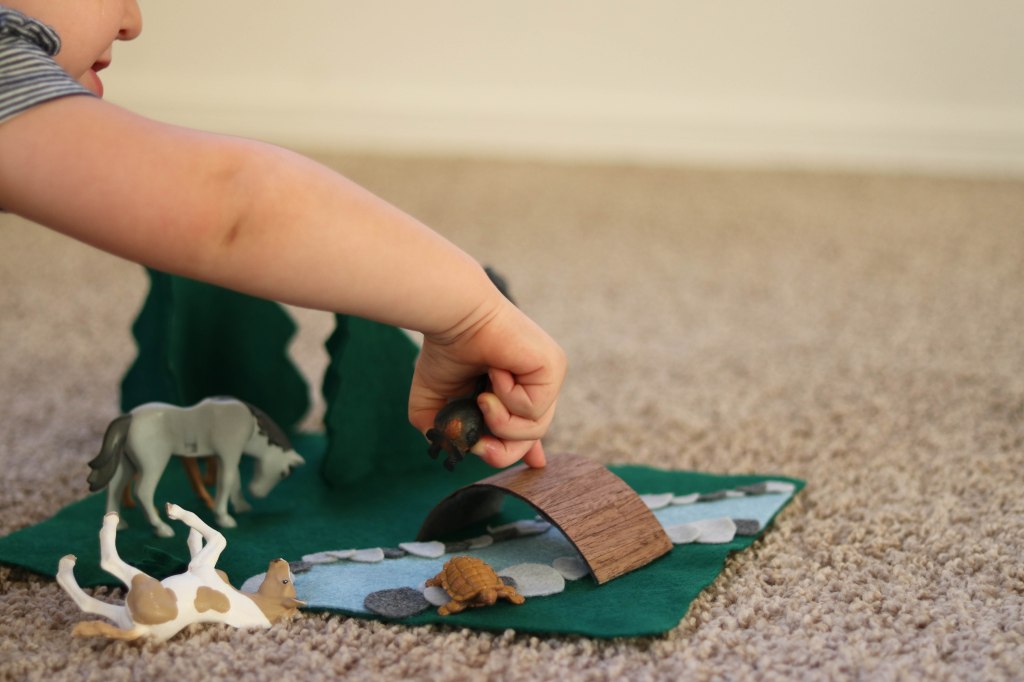
Does your little one have a playscape? What is their favorite way to use it? If you try out this project, let me know how it turned out for you!


Leave a comment